This is a quick post to show some more updates to the styling of the GUI.
I have been experimenting with customising the look-and-feel of my GUI using Qt Style Sheets (QSS) which are closely related to HTML Cascading Style Sheets (CSS).
Customised widgets
I have so far customised most of the widgets which appear in the GUI, as shown in the following examples. I have chosen a blue/grey theme throughout, with some exceptions for specialised widgets and items.
-

-
Push button, unpressed
-

-
Push button, pressed
-

-
Push button, disabled
-

-
Special button, unpressed
-

-
Special button, pressed
-

-
Custom double slider
-

-
Checkbox, unchecked
-

-
Checkbox, checked
-

-
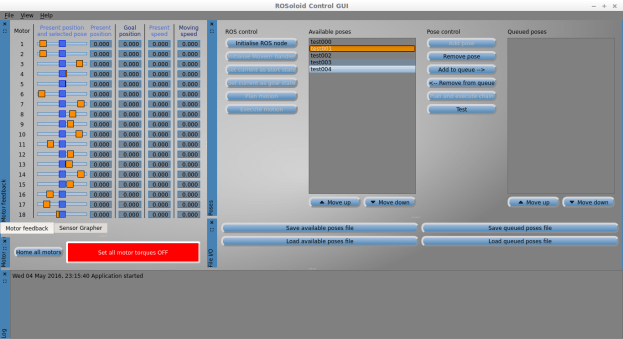
Table view, with a selected row highlighted.
-
-
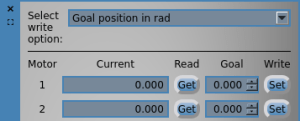
Combination of various widgets: Combo box, horizontal line (frame), labels, line edits, push buttons, spin boxes and the controls of the dock widget.
-
-
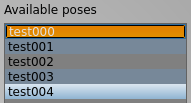
List view. In light blue is the item currently highlighted by the mouse pointer. In orange is the currently selected item, the joint position values of which are reflected in the double slider widget. The rest of the items are coloured with the alternating row colours dark grey and dark blue.
-

-
Updated motor dial, in its initialiased state.
Code
Initially the style sheets were embedded in QStrings inside the code, but they were dotted around various classes which meant a lot of code was duplicated as I kept adding content. I then moved the style sheets (QSS) for each widget to a separate text file, and set them via each class individually. Finally I found a way of greatly simplifying this by putting all the code into one single file. This is applied through the program’s main window (QMainWindow). Exception widgets use custom QSS Selector ID, which is set with setObjectName(). This is a nice way of applying specialised styles to specific widgets, such as e.g. a button that needs to stand out.
Here are two QSS examples of the standard and special button shown earlier:
QPushButton {
    background-color: qlineargradient(x1: 0, y1: 0, x2: 0, y2: 1, stop: 0 lightsteelblue, stop: 1 steelblue);
    border-color: #8F8F91;
    border-style: outset;
    border-width: 4px;
    border-radius: 10px;
}
QPushButton:flat {
    border: none; /* no border for a flat push button */
}
QPushButton:default {
    border-color: royalblue; /* make the default button prominent */
}
QPushButton:pressed {
    background-color: qlineargradient(x1: 0, y1: 0, x2: 0, y2: 1, stop: 0 royalblue, stop: 1 dodgerblue);
    border-style: inset;
}
QPushButton#redPushButton {
    color: white;
    background-color: red;
    border: solid lightgrey;
    border-style: outset;
    border-width: 4px;
    border-radius: 4px;
}
QPushButton#redPushButton:flat {
    border: none;  /* no border for a flat push button */
}
QPushButton#redPushButton:default {
    border-color: grey;  /* make the default button prominent */
}
QPushButton#redPushButton:pressed {
    color: red;
    background-color: darkred;
    border: solid red;
    border-style: inset;
    border-width: 4px;
    border-radius: 4px;
}
As usual, the latest source code is available on GitHub if you want to have a look.